Taking your bedroom to the next level - DIY coffered wall with decoflair

A bedroom is always very special. It is obviously an extremely intimate space, which should suit your tastes and personality. This is why decorating your bedroom and turning it into your happy place is so important.
In this article, we will show you how to easily pull off a sophisticated and casual coffered wall from scratch using our decoflair profiles to make your room that little cosier.
WHAT YOU’LL NEED
Obviously, the quantities and amounts you will need for your project vary according to the dimensions of your bed and wall. Through this article, we will give you an insight on the step-by-step process, which always remains the same. Here’s what was needed for this particular project:
Essential decoflair items
- 10 lengths of the decoflair C9 chair rail (70x15x2000mm)
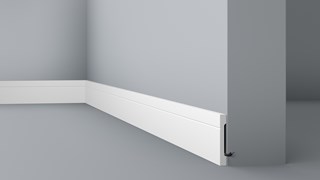
- 2 lengths of the decoflair C12 skirting (110x15x2000mm)
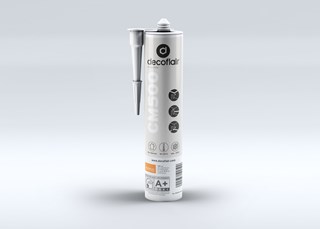
- 3 cartridges of our decoflair CM500 glue
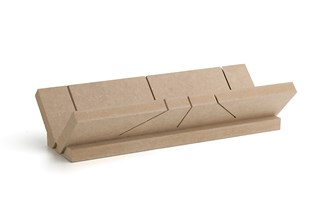
- Decoflair MB2 mitre box
Other must-haves
- 1 bucket of paint in volcanic grey (2,5l)
- Large tooth saw
- Paint roller
- Cartridge applicator gun
- Spirit level
- Pencil
- Tape measure or folding rule
- Paint brush
- Sanding paper 150 grit or finer
- Spatula, sponge or cloth
STEP 1: PLANING YOUR LAYOUT
As in most DIY projects, planning is key here. In this project, we decided to stop the panelling a few centimetres above the headboard to give a nice contrast of colours and textures between the two sections of the wall. Two vertical chair rails were placed on either side of the headboard with another horizontal one right above it to nicely frame the bed and give the wall that custom look. We also chose to integrate a white skirting to detach the wall decor from the ground and make it stand out even more.

STEP 2: MARKING THE FIELDS ON THE WALL
Once you have figured out how you wish to arrange you display, grab your pencil and spirit level and start tracing the lines where you will be fixing the chair rails. Make sure to take the height of the skirting (11cm) and chair rails (7cm) into consideration when dividing your wall into fields.

STEP 3: CUTTING THE PROFILES
Place the chair rails and skirtings in the mitre box and cut them using a saw to the length you need for your display. All you will need for this DIY are straight cuts, so simply saw the profiles through the 90° angle of your mitre box.

Insider tip: after cutting use 150 grit or finer sanding paper to make the edges as smooth as possible to get a clean result.
STEP 4: FIXING THE CHAIR RAILS
Start off by placing the chair rails that will be vertically fixed to the wall. Using the glue gun, apply a fine strip of decoflair CM500 glue on both adhesive surfaces on the backside of the chair rail. Then place your chair rails on your wall markings and make sure to take the 11cm gap for the skirting into account. Then complete your set-up by fixing the chair rails that will be fixed horizontally to the wall. Once all your chair rails are fixed, let the glue dry for at least 6 hours before moving on to the next step.

Insider tip: you can remove any excess glue when fixing the chair rails using a spatula, damp sponge or cloth.
STEP 5: GET PAINTING!
Using a paint roller (and a brush for the tougher spots to reach), cover the section of the wall and the chair rails with two layers of paint then let it all dry for at least 6 hours.

STEP 6: FIXING THE SKIRTING
Fill the gap bellow your installed chair rails with the plain white skirting to give that nice contrast and make your wall decor really pop. It is best to paint the skirting in the desired colour beforehand. Simply fix the skirting to the wall in the same way you fixed the chair rails and you’re done!

All that is left to do is enjoy the peace and quiet of your newfound safe space.

Associated products

C12 decoflair
Skirtings
2000 mm x 110 mm x 15 mm (2 m / pack)

Decoflair CM500 (310 ml)
Glues
68 mm x 235 mm x 48 mm (1 pc / pc)

MB2 decoflair
Tools
350 mm x 150 mm x 150 mm (1 pc / pc)